Indentation is a crucial aspect of writing clean and readable code. It helps developers understand the structure and hierarchy of their codebase. Visual Studio Code (VS Code) is a popular code editor that offers powerful features for developers. However, at times, indentation issues can arise, leading to code readability problems and potential errors. In this article, we will explore various methods to fix Indentation vs Code and ensure your code remains organized and easy to comprehend.
- Understanding Indentation: Before diving into the techniques to fix indentation, let’s have a brief overview of what indentation means in programming. Indentation refers to the spaces or tabs added at the beginning of lines to indicate the level of nesting within code blocks, such as loops, conditionals, and function definitions.
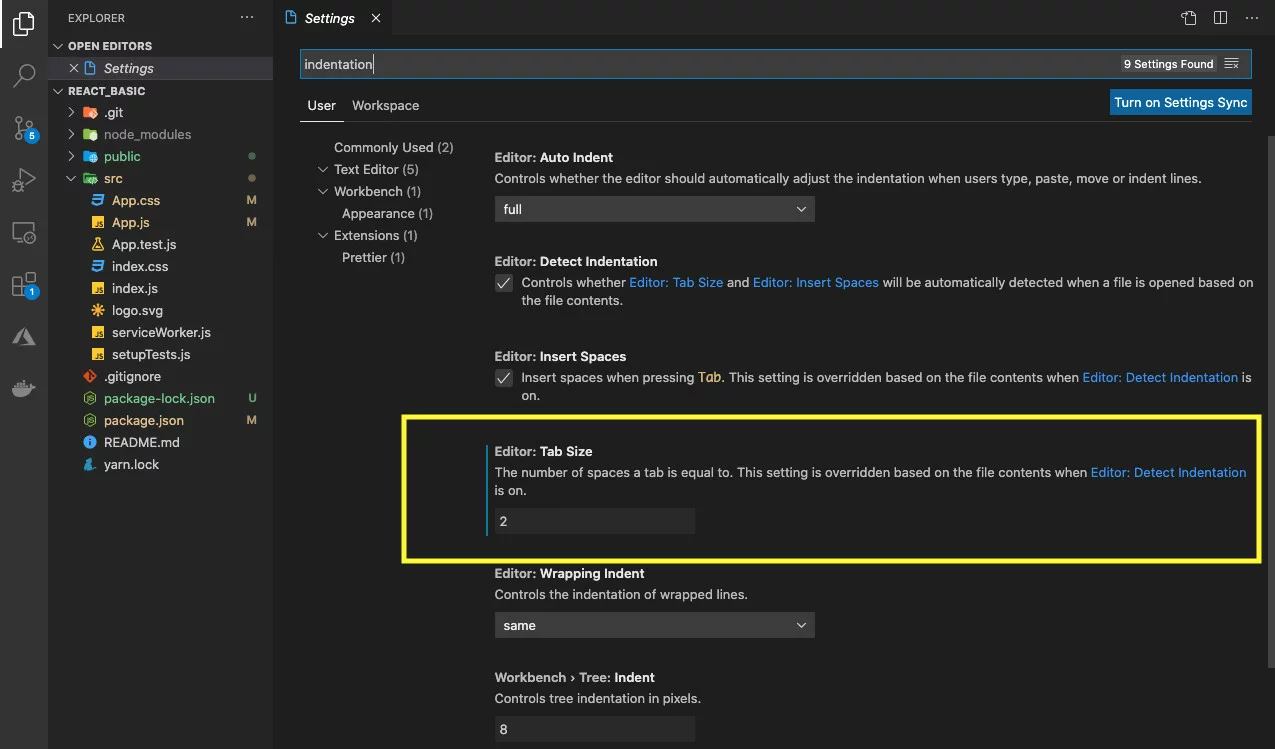
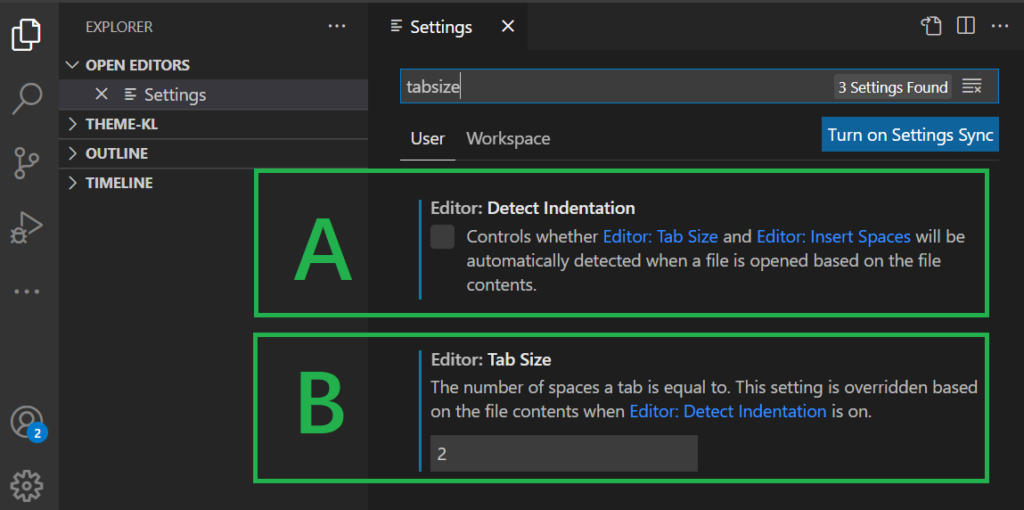
- Enabling Automatic Indentation: VS Code provides built-in support for automatic indentation, which can save you time and effort. To ensure automatic indentation is enabled, go to the “Settings” menu, search for “Tab Size,” and set it to your desired value. Additionally, check the “Detect Indentation” option to let VS Code automatically detect the indentation style of a file.
- Adjusting Indentation Settings: Sometimes, the default indentation settings in VS Code might not align with your project’s requirements. To modify indentation settings, access the “Settings” menu and search for “Indentation.” You can customize the tab size, indentation style (spaces or tabs), and whether to use a tab or spaces for indentation.
- Manually Fixing Indentation: If you encounter indentation issues in your codebase, you can manually adjust the indentation for specific lines or blocks. VS Code offers multiple helpful shortcuts to make this process efficient. You can select a block of code and use the “Tab” or “Shift+Tab” keys to increase or decrease the indentation level respectively. To indent multiple lines simultaneously, use the “Ctrl+]” and “Ctrl+[” shortcuts.
- Utilizing Code Formatter Extensions: VS Code has a vast library of extensions that can enhance your coding experience. Many of these extensions include code formatters that automatically correct indentation for you. Popular formatter extensions, such as Prettier, Beautify, and ESLint, can be easily installed from the VS Code extension marketplace. Configure them to follow your preferred indentation style, and they will handle the rest.
- Leveraging Linting Tools: Linting tools like ESLint, TSLint, or Flake8 can not only detect coding errors but also help maintain a consistent code style. They often include indentation rules that can automatically fix indentation issues. Install the relevant linter extension for your programming language and configure it to enforce indentation rules. Running the linter will highlight and fix any indentation errors it detects.
- Using EditorConfig: EditorConfig is a popular file format that defines and maintains consistent coding styles across multiple editors and IDEs. By including an .editorconfig file in your project, you can specify indentation settings, line endings, and other formatting rules. VS Code has built-in support for EditorConfig, and once you have an .editorconfig file in your project, it will automatically adhere to the defined indentation rules.
Indentation is a fundamental aspect of coding that significantly impacts code readability and maintainability. In Visual Studio Code, ensuring proper indentation is crucial for writing clean and organized code. Throughout this comprehensive guide, we have explored various methods to fix indentation issues in fix Indentation vs Code.
By enabling automatic indentation and adjusting the indentation settings, you can align your code with your preferred style. This saves time and ensures consistent formatting across your projects. Additionally, manually fixing indentation allows you to fine-tune the alignment for specific lines or blocks of code.
Utilizing code formatter extensions, such as Prettier or Beautify, simplifies the process of fixing indentation. These fix Indentation vs Code extensions automatically correct indentation based on predefined rules, promoting consistent coding standards.
Leveraging linting tools like ESLint or TSLint not only helps identify code errors but also enforces indentation rules. These tools highlight indentation issues and offer automated fixes, ensuring your code remains well-indented and readable.
Furthermore, using EditorConfig allows you to maintain consistent coding styles across different editors and IDEs. By defining indentation settings in an .editorconfig file, you can ensure that all developers working on the project adhere to the same indentation standards.
In conclusion, fix Indentation vs Code maintaining proper indentation in Visual Studio Code is essential for code readability and collaboration. By following the techniques discussed in this guide, you can fix indentation issues efficiently, resulting in cleaner, more organized code. Remember, consistent indentation enhances code comprehension and facilitates a smoother development process.